Quickstart
Editor
This is the editor view, which is the first thing you see when opening up the site and pressing “PLAY”.
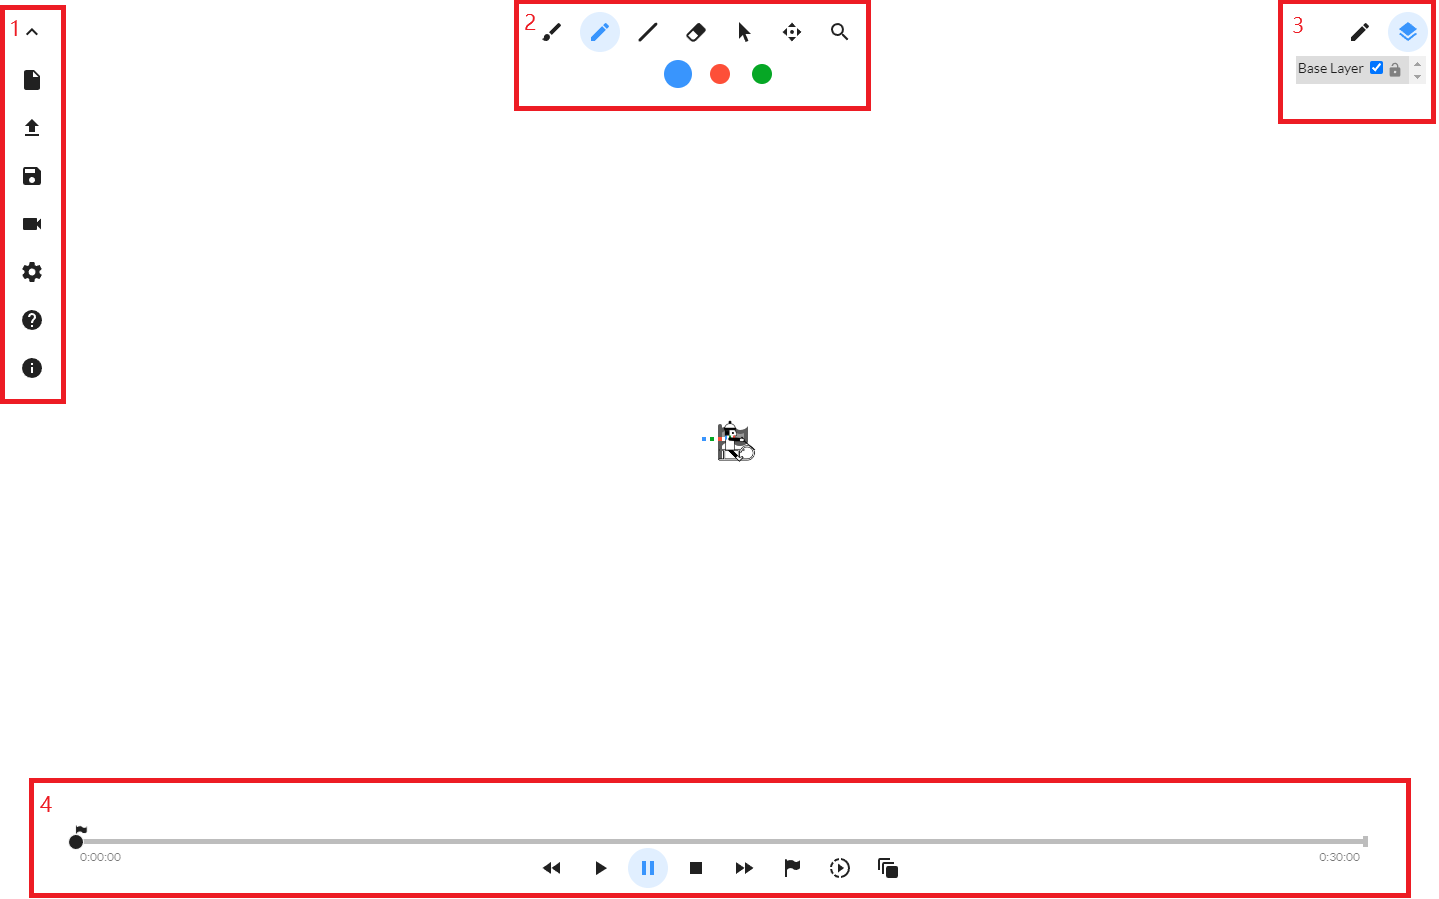
The blank white void surrounding the rider is called the canvas, which is where lines are drawn for the rider to interact with. Scattered on top of the canvas are a bunch of different widgets that may seem a little intimidating at first. Let’s take a look at what each of them do.
The sidebar (1) holds track settings that make editing easier, such as hotkey preferences and track framerate. These and other sidebar components are explored later on in this article and more in-depth in the basic tutorials section.
The toolbar (2) contains tools helpful for editing and moving around track files, and the timeline (4) lets you replay your track, edit the speed, and more. Tips for mastering these and other editor shortcuts can be found in the editor shortcuts tutorial.
The layers container (3) provides an interface for adding and editing track layers. These layers can be hidden, locked from editing, recolored, and reordered to display on top of each other. Some of the more advanced capabilities of layers are explained in the layer automation scripting tutorial.
Sidebar
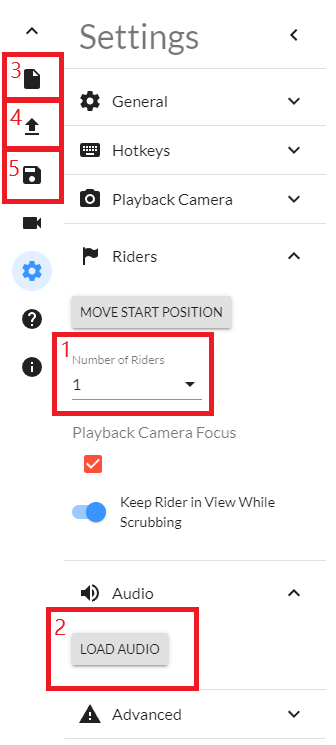
This is the sidebar page with the settings tab open.
While the sidebar has many other important features, these are some of the primary features you need to get started.
In the settings tab, the Riders section has a dropdown (1) for adding multiple riders to your track, as well as a tool to drag around their start positions in the editor.
Also in settings is the Audio section, which lets you load audio (2) that plays in the background of your track. It also has volume and offset settings for the audio file.
Other sidebar tabs include the new button (3) for creating a blank track, the load button (4) for loading a track from your local files or from online saves, and the save button (5), which lets you save your track locally or online with details about your track.
Recording
Currently, recording tracks with audio is not supported. You must add the audio yourself in an editing software or online video editor, or use another method of recording such as OBS.
This is the recording page, which can be accessed by pressing the export button on the sidebar.
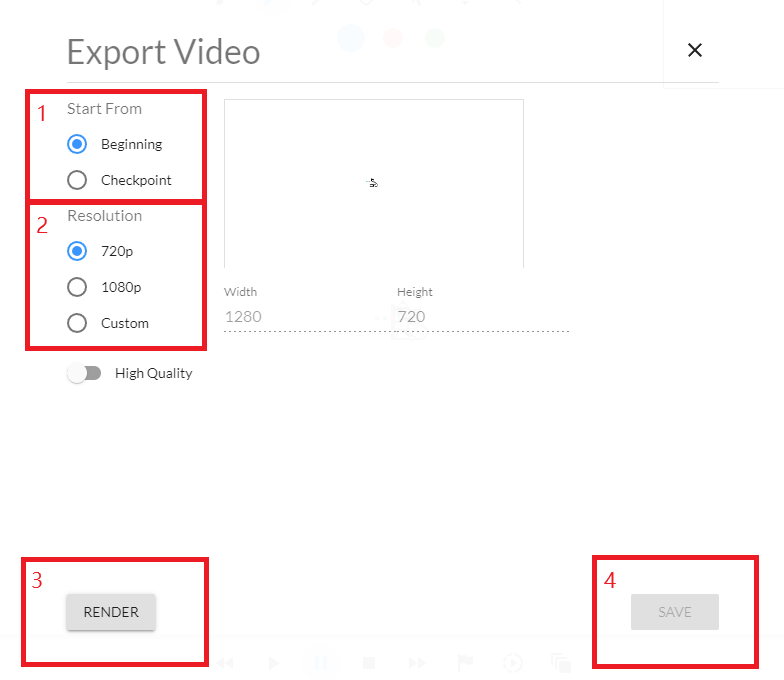
This lets you record the track from within the browser, offering settings for the start of playback (1) and export resolution (2). For an initial recording, the default settings are fine.
Once you are done adjusting these, the track can be recorded with the render button (3). It may take a while for the track to record, and you must keep the tab open for the track to fully render. Once it finishes, the video can be downloaded with the save button (4).